Looking After Your
Manual Gearbox
For the duration of its production life, the P6 was available with two basic transmission options. A Rover-designed 4-speed all-synchromesh manual gearbox available in various configurations in the 2000 and 2200 models, and in a strengthened and revised form in all 3500S models. And a family of Borg Warner automatic transmissions, which were bought-in from the American supplier and offered as an optional on four-cylinder models from 1966, and as standard fitment to all 3500 models.
In this article we show you how to look after your gearbox in situ to help prolong its life, as well as the common pitfalls to look out for.
The P6 Manual Gearbox Family
 The P6 manual gearbox is a unique gearbox that was designed specifically for the 2000 in the early 1960s. It uses silent-running helical-cut gear sets with quality baulk-ring synchromesh on all forward gears. There are 3 forward gear sets - fourth gear is achieved by locking the input shaft to the output shaft, thereby bypassing the gear clusters to create a 1:1 transmission ratio. Selection is by remote with a short gear lever, and it has a lightweight aluminium housing in the interests of saving weight. The clutch is a sporting Borg & Beck diaphragm with hydraulically controlled release.
If kept in good order, P6 manual gearboxes are capable of covering large distances without significant problems. However, there are some issues to watch out for.
| 2000 Series 1 | 2000 Series 2 | 2200 | 3500S |
| SC - 400, 401 | SC - 436 | SC - 471 | All - 481, 485 |
| TC - 415, 416 | TC - 446, 450 | TC - 491 |
Using the table above, look at the first three digits of your engine number to identify which of the four main variations of the gearbox you have. All gearboxes have the same internal ratios, but there were various changes to materials, bearings and selector mechanisms throughout production. Note that series 1 drivetrains were fitted to series 2 bodies until late 1971 to use up stock, so your engine number is the best identifier for a J-reg 2000 short of slipping underneath to inspect it.
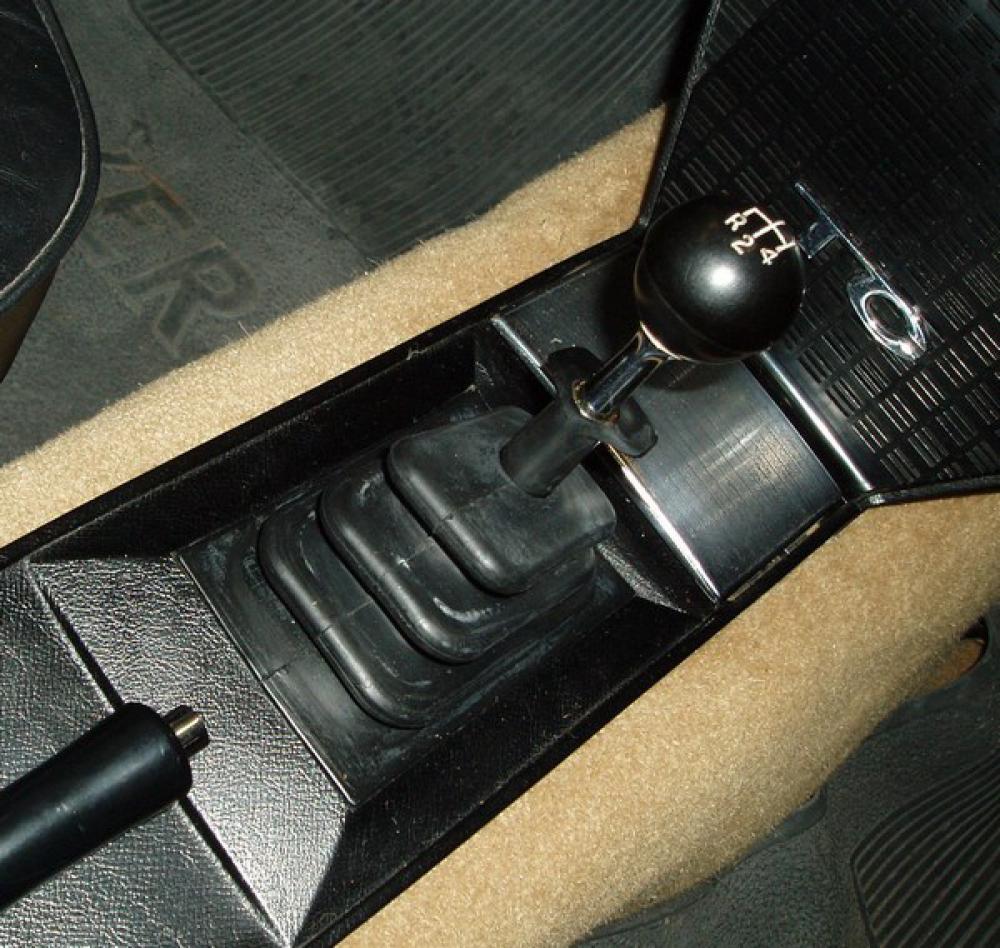
Series 1 gearboxes have the gear lever remote selector bolted to the transmission tunnel of the body, with the selector shaft reaching through the empty space between the tunnel and gearbox. Series 2, 2200 and 3500S gearboxes all have a remote selector carrier casting bolted to the gearbox which positions the gear lever beneath the hole in the tunnel.
This has a dramatic effect on the ‘feel’ of the gearbox. Series 1 setups are notoriously ‘notchy’ and it can be difficult to select (or even find!) the right gear. Later setups have a much more positive movement, but there can be quite a lot of ‘slop’ in the gear lever, which can rattle annoyingly at speed.
3500S gearboxes have shot-peened (strengthened) gear clusters and selectors, and an internal oil pump to pressure lubricate the bearings. 2200 gearboxes have the 3500S’s clusters and selectors in the standard Series 2 2000 housing without the pressure lubrication. 2200 gearboxes are therefore a reasonable upgrade for earlier cars, but be aware that stocks of new 3500S clusters and selectors are now virtually unobtainable making the cost of rebuilding a 3500S or 2200 gearbox prohibitively expensive, if not impossible.
Start with an oil change
Drive the car until the gearbox oil is hot - say 15 mins. Drain the oil and let it run out for at least half an hour (you will get a further half pint out in dribbles if you leave it for the full time). Replace the copper washer and put the plug back in. If you find a selector dog tooth in the drain plug, don’t panic. This probably happened a long time ago when somebody crashed the gears. If the gearbox is still operational, you should be fine provided you don’t rush gear changes, and it is better that this tooth is removed from the gearbox rather than left rattling around in the bottom. Nonetheless, you should think about a transmission rebuild in the future if you intend to drive the car hard.
Refill the gearbox up to the filler neck with a good quality 20w50 mineral oil (filler behind grommet on passenger side transmission tunnel). DO NOT use anything else as the yellow metals in the gearbox can be damaged by unsuitable gear oils. If you find a pink/red gear oil in it, replace it immediately with fresh mineral oil, and ideally replace that again after a few hundred miles to ensure a complete flush. For high mileage and Series 1 ’boxes, we would recommend Millers 20w50 Mini Classic oil, which is specifically formulated for engines with a gearbox in sump (BMC A-series, E-Series, etc) to protect bearings and gear clusters in more extreme environments.
Series 1 gearboxes went through a series of almost annual production changes from launch to 1967, when the specification finally settled down. The principle changes were to the bearing designs. As such, early gearboxes may be noisier or more badly worn than later examples. If you plan to replace your gearbox, we would recommend sourcing a late Series 1 gearbox as a minimum, but preferably a Series 2 or 2200 gearbox, which offer a series of advantages (although modification to the trans tunnel is necessary to fit to a Series 1). It is not advisable to fit a 3500S gearbox to a four-cylinder due to the additional work required.
Bleeding the clutch the easy way
The clutch release bearing is lubricated by a splash-fed channel from the gearbox. If left for a long period standing, the oil can drain back from this channel. This is the root of the common problem selecting gear (particularly reverse) when the gearbox is cold. Don’t worry, the oil will soon replenish itself in the channel. As such, it is normal to see a small oil drip from the rear of the bellhousing, usually collecting on the drain plug. If the selection does not improve as the gearbox warms up, the clutch push-rod may be incorrectly adjusted, or the release bearing may be suspect.
Bleeding the clutch can be a arduous task. By far the easiest method is to fit a flexible hydraulic pipe and unbolt the slave cylinder from the bell housing. Raise it above the level of the master and open the bleed nipple. Compress the slave by pushing the push-rod fully home and hold it there with string or a cable tie. Offer the slave back up to the bell housing.
You will probably now find that the push-rod is too short to reach the release arm. Measure the approximate additional distance you need. Remove the push-rod and extend it on the thread. You will now need to open the bleed nipple to push the piston home again. Repeat until the push-rod is about 1/4” too short to reach the release arm when it is pulled fully back (towards the front of the car).
Now bring the slave back up above the level of the master and fill the master with DOT4 brake fluid. Get an assistant to apply gentle pressure to the pedal until the bleed nipple runs clear. Tighten if off and bolt the slave back up to the bell housing. As soon as you release the cable tie/string, the piston will start moving out of its own accord. Use this movement to cover the additional 1/4” necessary for the push-rod to engage with the release arm. Put the pin back in and secure it with a split pin. Top up the master to the correct level and road test. You should find the pedal is much lighter with a positive movement.
Drivetrain alignment
Whilst underneath you should also check your drivetrain is correctly aligned - the small spring beneath the rear of the gearbox should be perpendicular and exactly in the middle of the gearbox. The correct process for this is outlined in the workshop manual, and covered in Driving Force last year. Contact us for a copy of this article.
Clutch Judder
Clutches can develop judder from persistent town driving. The recommended solution in the workshop manual is to slip the clutch at speed to brutally scorch the plates and reveal a new, fresh layer of friction material. Unless you know the integrity of your clutch, we would not recommend this practice today.
Gear selection mechanisms
For Series 1 gearboxes, the only way to improve gear selection is to ensure the engine/gearbox is correctly aligned in the transmission tunnel - this has a dramatic effect on where the gears fall in the gate. Beyond this, you should make sure that the spherical joint, plastic bush and ‘acorn’ on the bottom of the gear lever are clean, free from dirt and intact (replacement levers are plastic bushes are available). Grease them liberally before reassembling. You will need to remove the centre console to access the remote mechanism.
 For later gearboxes, the above applies to the gear lever, but there are a series of bushes in the remote housing that also need inspecting. It is common for these bushes to wear and slide out of the carriers. If you can move you gear lever from side to side in either third, fourth or reverse gear, and the size of that movement is almost as large as the movement in neutral, you will need to rebush your selector shaft as a minimum.
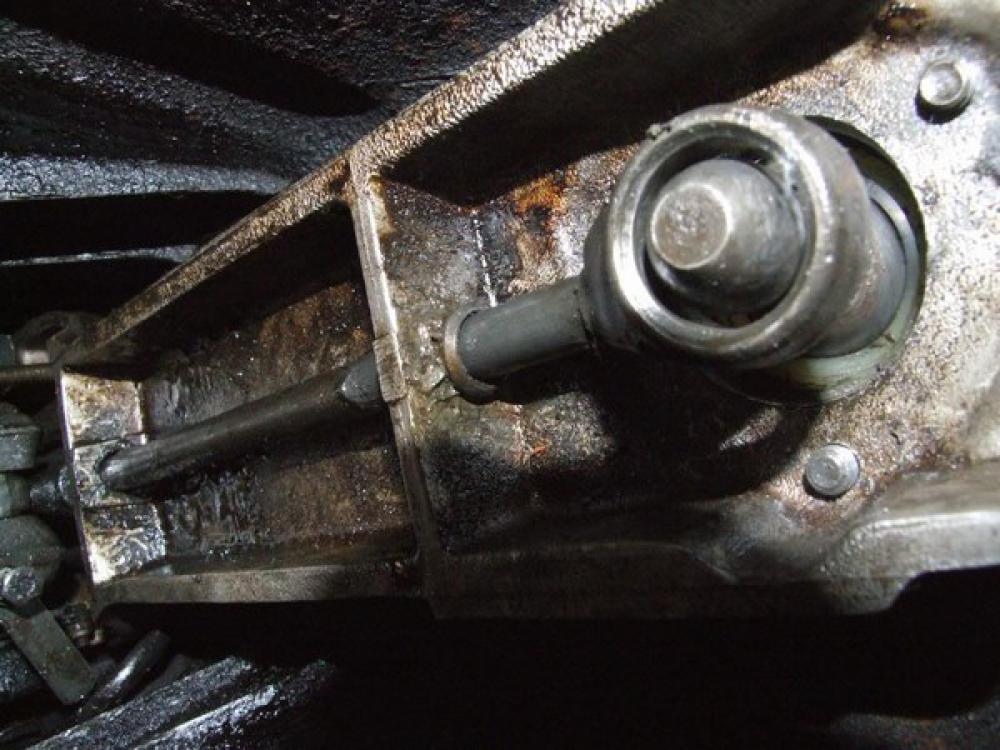
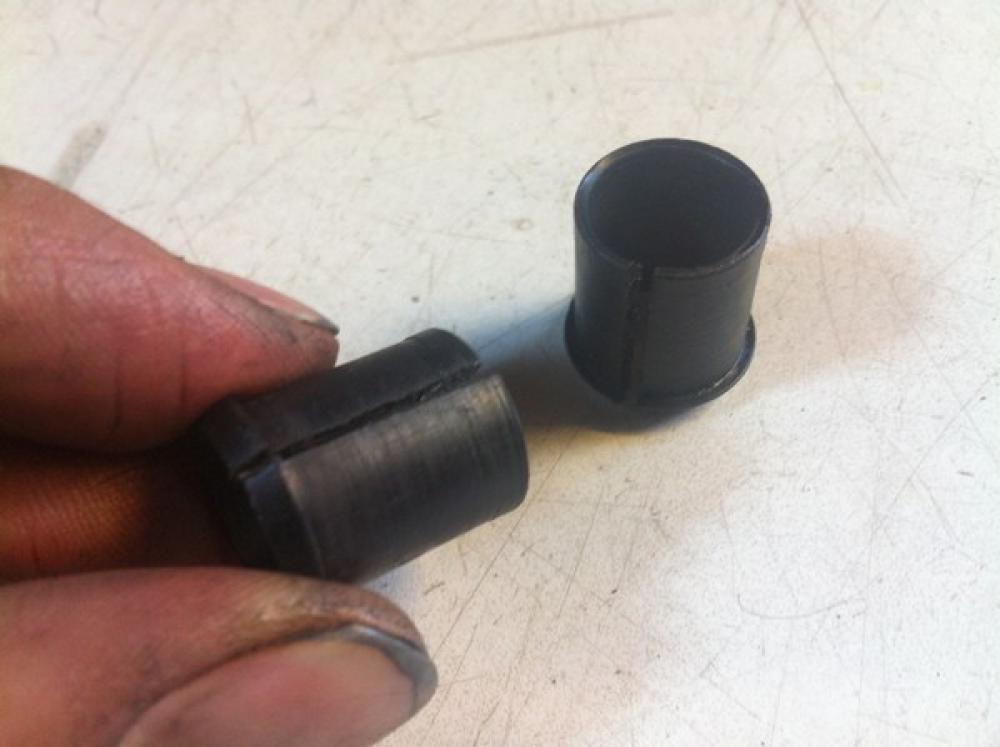
To do this, support the car suitably and safely at the front. When underneath the car, look up into the transmission tunnel above the exhaust pipe and front joint on the prop shaft. The cast alloy housing with the two ribs is the remote housing. You will probably be able to see two nylon bushes floating on the selector shaft. [S2 selector] These have a split in them so they can be removed in situ. Prise them off the shaft with your fingers. When new, these bushes had locating shoulders on them to hold them in position, but as this has worn, the bush has slid out. You can refit your existing ones easily by cleaning them up and carefully putting epoxy glue or similar on the outside. Take great care and be sparing with this - you do not want to bind you gear selector shaft to the housing!
 Reinsert the bushes over the shaft and slot them home into the carriers. Check the gearbox selects all gears and leave it in reverse for a few minutes (this gear places more lateral pressure on the selector shaft than the others helping the glue to bond under pressure).
Alternatively, you can buy new selector bushes from some suppliers. These will still have the locating shoulder on them so will not need to be glued in place. If you are removing the gearbox entirely, or rebuilding a spare one, some P6 companies are machining new phosphor bronze bushes and turning down the shafts for a pin-sharp gear change.
Gear levers
There were a variety of different gear levers available during the production life of the car - short, medium and long gear levers for Series 1, Series 2 and post-1973 cars respectively (give or take). All are interchangeable, although the material of the ‘acorn’ at the bottom of the lever differed. Early cars had a metal acorn that offers a very crisp change but can rattle. Later acorns were a PTFE material (or similar) which can break off or disintegrate. Repairs are difficult and replacements are not difficult to source.
Written for Driving Force Magazine by Michael Allen