Looking After Your
Borg Warner Automatic Gearbox
 Borg Warner model 35 gearboxes are fitted to 2000 and 2200 Autos, and in a different configuration to 3500 Autos up until the end of the 1973 model year. From the start of the 1974 model year in October 1973, Borg Warner 65 gearboxes are fitted to V8’s. The 65 is easily identified by having the dip stick and filler tube on the left hand, near side of the engine bay instead of on the right hand, off side for the 35, as well as having a rod linkage to the gear selector instead of cable.
These gearboxes have some unexpected characteristics liable to catch out the unprepared home mechanic. This article attempts to talk you through some of them.
To start with, the fluid level checking procedure is stated incorrectly in several places in the Rover Factory manual and the workshop manuals. The correct level check is as set out here, drawn from the experience of experts and from the Borg Warner manuals.
First drive the car sufficiently for the transmission fluid to be hot, say 15 minutes. Make sure the gearbox has spent time in all three forward gears and in reverse immediately prior to halting the car, and also run the selector through all gear positions immediately after bringing the car to a stand with the engine still running. This is to make sure that the torque converter and all passages in the valve block, along with the clutch servos are full of transmission fluid. They otherwise drain back into the gearbox sump and give a false reading. Do not switch the engine off. You should then dip the gearbox immediately with the engine running at idle, and top it up to the “hot” level on the dip stick.
The correct fluid level is crucial to gearbox behaviour, having a high or low fluid level will cause harsh, late or early changes and a harsh drive take up.
When topping up the gearbox fluid, you MUST use the correct fluid – ATF-G or Ford spec M2C-33G. Other fluids sold for modern automatics are normally Dextron based and destroy the integrity of the clutch and band friction linings. The gearbox will almost certainly fail after only a couple of thousand miles with Dextron instead of the correct fluid.
If you have reason to believe that the fluid may have been previously topped up or changed with a Dextron fluid, change the fluid for the correct specification immediately. This is likely to take at least four complete drain and change sequences to replace all of the fluid retained in the torque converter and valve block.
Taking this a little further, a high mileage ‘box may well have particles of friction material suspended in the fluid. These greatly assist the clutches and bands to grip. So changing the transmission fluid may well bring on almost immediate failure. Certain symptoms might cause you to drop the gearbox sump to change or clean the fluid filter immediately within. But in that case you should take the steps outlined above to try and keep as much fluid as possible contained within the torque converter and valve block so that you lose and have to replace the minimum amount of fluid.
The smell of the fluid is the best guide to what is happening within – a burnt smell is an indication that clutch plates and brake bands are in the process of failing. In this scenario, changing the fluid is likely to accelerate the failure, so best not to, but be prepared for a transmission rebuild in the near future!
Water in the fluid indicates a failed cooling element in the cold side tank of the radiator. The first thing to do is get the radiator reconditioned with special emphasis on the transmission cooler in the cold side tank. It may then be worth doing a fluid change – a minimum of four times to get everything out of the converter – but a complete failure is still the most likely outcome.
A harsh drive take up – a clonk from the rear of the car as the gear (particularly reverse) engages – can also be due to an incorrectly set engine idle speed. The factory figure is 650rpm, but if your engine can be persuaded to idle slower than this, anything down to 500rpm is advantageous. It will certainly help the life of the differential output drive shaft flanges – a known weak point.
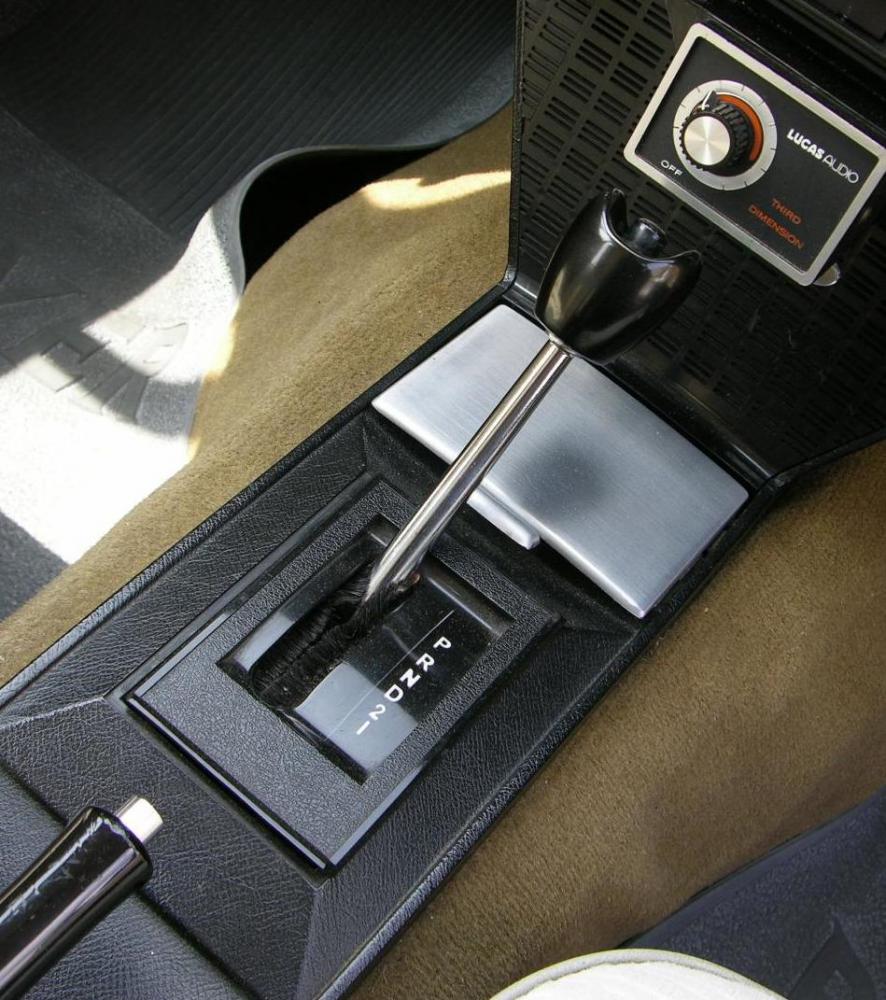
The kick-down cable attached to the throttle linkage close to the carburettors is much misunderstood. It is much, much more than just a kick-down cable! The hydraulic “brain”, or valve block, of the transmission relies on three inputs to determine which bands and clutches engage to give the required gear. The first is the gear selector. This very rarely requires adjustment and then only if either neutral, park or reverse are unobtainable because the lever is in the wrong place relative to the detents in the gearbox. This should be obvious. Next the valve block detects road speed through a hydraulic pump at the back of the box attached to the output shaft. Finally, the pump at the front of the gearbox feeds to the valve block a pressure that is proportional to engine revs and is modulated to give a measure of throttle position by the kick-down cable position.
The kick-down cable therefore has a major influence on the gearbox behaviour under ALL conditions, not just when you want full performance. There is an intimidating series of pressure measurements specified in the workshop manual to set it up. For most purposes these can be distilled to a simple practical test of the road speed at which the box changes into third (top) gear under light throttle conditions. It should be between 40 and 45 mph – ideally 43 mph. The kick-down cable should be adjusted to achieve this. You might find then that the car won’t “kick down”! The likely cause of this is free play in the throttle linkage preventing you achieving full throttle at the carbs, such as a missing rubber bush at the bulkhead where the throttle linkage passes across the space between car and engine. These comments apply to all four-cylinder and both varieties of V8 installation.
Failure of a ‘box is usually down to worn out friction material, but can also be due to problems with clutch servos and front or back pumps. Oil seals are also known to leak after long periods standing, but these often reseal after a few thousand miles of regular use. Another cause of leaks is fluid draining back from the torque converter after periods standing. Again, regular use is the answer.
Another troublesome component is the start inhibitor switch on the outside of the gearbox. Quality replacements are difficult to source and the adjustable type can be awkward to set up. Symptoms of this problem are erratic operation of the reversing lights (they use the same switch) and having to jiggle the gear selector to get the right position for the car to start.
If your gearbox appears not to be performing correctly, we would strongly recommend you signing up to the Classic Rover Forum where free advice is readily available. “Harvey P6” is a regular contributor to the forum and recognised as sufficient of an expert on these gearboxes to advise the Americans on their own gearbox! We’d recommend having an online chat to guide you through fault-finding before committing to expensive repairs.
In all fault finding, make one change only at a time, road test the car afterwards and record the change and its effect on how the car drives. With the exception of the fluid level checking procedure, the workshop manual is pretty good, and you should follow its instructions as you fault-find or repair. There are very few genuine experts out there for these boxes, so if you plan to do any work yourself, stick rigidly to the Workshop manual and Harvey’s online advice. Ignore other so-called experts including specialist transmission firms – ask them how long it is since they saw a Borg Warner of this period.
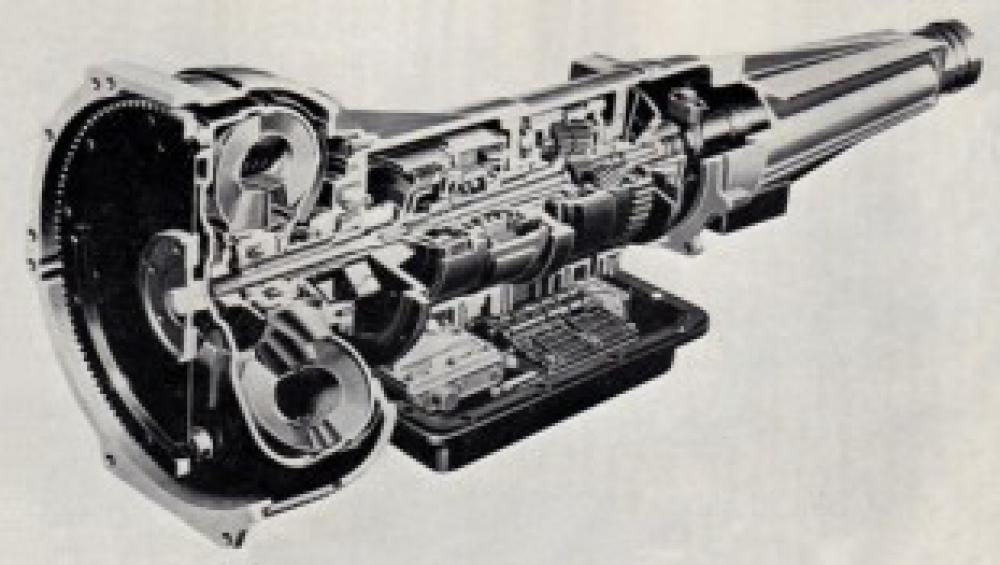 Should you need to rebuild a ‘box – some adjustments can be made externally to clutches and bands – the reality inside the box is nowhere near as daunting as the diagrams in the workshop manual suggest. Whether doing it yourself or employing a professional, the absolute bare minimum action is renewing all of the bands and clutch plates, renewing the seals on the servo pistons (they’ll be operating in a previously unused part of the servo bore) and renewing both front and back pumps. Other repairs can be undertaken on condition.
Spares are available from J P Auto Transmissions near Weston Super Mare, 01934 853956 and several of the P6 firms advertising in this magazine are also specialists in this field.
Written for Driving Force Magazine by Chris York